In today’s digital age, where everything is stored and shared online, it can be easy to forget the sentimental value of physical keepsakes. That’s why creating a custom memory box is a cherished way to preserve and celebrate special memories. Whether it’s for a wedding, anniversary, birthday, or any other special occasion, a custom memory box provides a tangible reminder of precious moments that will be treasured for years to come. In this article, we will provide you with expert tips on how to create the perfect custom memory box that will exceed your expectations.
The importance of custom memory boxes
Custom memory boxes hold a significant place in our hearts and homes. They are more than just storage containers; they are carefully curated collections of memories that tell our unique stories. Here’s why custom memory boxes are so important:
Preservation of memories:
Custom memory boxes serve as a time capsule, keeping precious mementos safe and protected. From photographs and handwritten notes to souvenirs and trinkets, these boxes safeguard our most cherished memories for years to come.
Personalization:
Unlike store-bought storage solutions, custom memory boxes can be tailored to reflect individual preferences and interests. By hand-picking materials, colors, and designs, you can create a box that truly represents your personality or the recipient’s style.
Emotional connection:
The act of creating a custom memory box is a deeply personal and sentimental experience. It allows you to revisit cherished memories and relive the emotions associated with them. It also provides an opportunity to share these memories with future generations.
Now that we understand the significance of custom memory boxes, let’s explore some expert tips on how to create the perfect one.
Expert tips for creating a custom memory box
1. Choosing the right box and materials
The first step in creating the perfect custom memory box is selecting the right box and materials. Here are some expert tips to guide you:
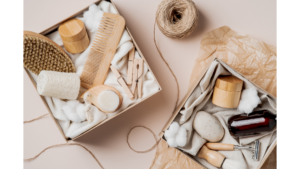
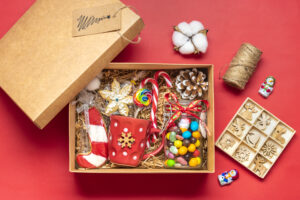
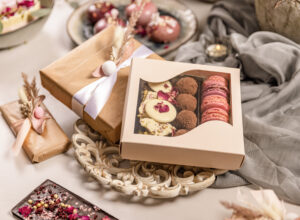
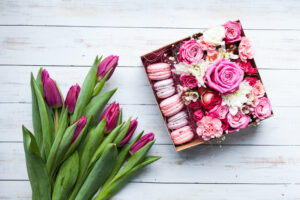
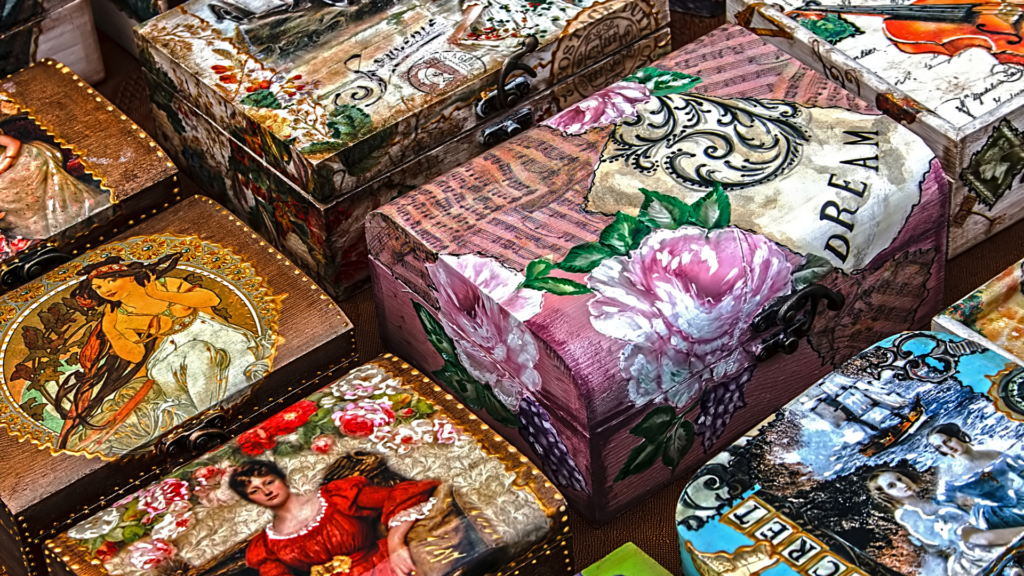
- Box Style: Choose a box style that suits the occasion and the individual’s taste. Options include wooden boxes, cardboard boxes, or even custom-made boxes with unique designs.
- Size: Consider the size of the items you plan to store in the memory box. Ensure that the box is large enough to accommodate them comfortably.
- Material Quality: Opt for high-quality materials that will withstand the test of time. Look for boxes made from durable materials like wood, leather, or sturdy cardboard.
- Personalization: Choose a box that can be personalized with the recipient’s name, special dates, or meaningful quotes. Personalization adds a personal touch and makes the memory box even more special.
2. Designing and decorating the custom memory box
The design and decoration of your custom memory box play a crucial role in its overall appeal. Follow these expert tips to create a visually stunning memory box:
- Theme: Determine a theme or concept for the memory box based on the occasion or the recipient’s interests. This will help create a cohesive and visually pleasing design.
- Color scheme: Choose a color scheme that complements the theme and evokes the desired emotions. Consider using colors that hold significance or have sentimental value to the recipient.
- Decorative elements: Adopt a custom packaging strategy to maintain simplicity while adding texture for visual appeal. use elements like ribbons, fabrics, lace, or stickers to add texture and visual interest. Be mindful not to overcrowd the box, as simplicity can often make a stronger impact.
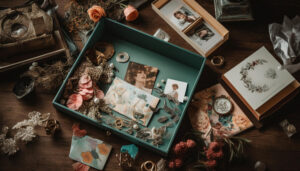
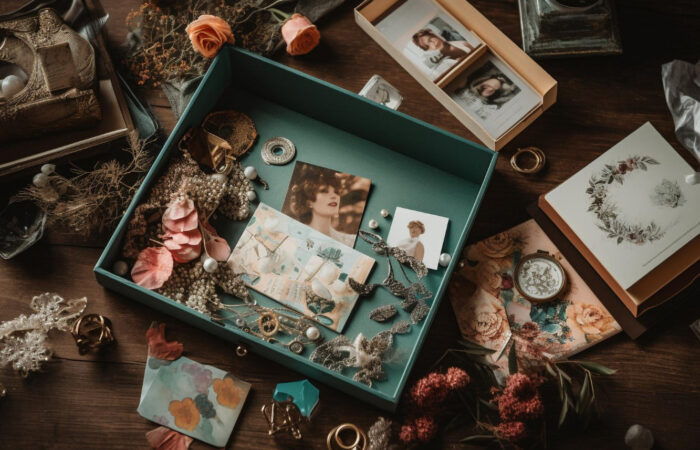
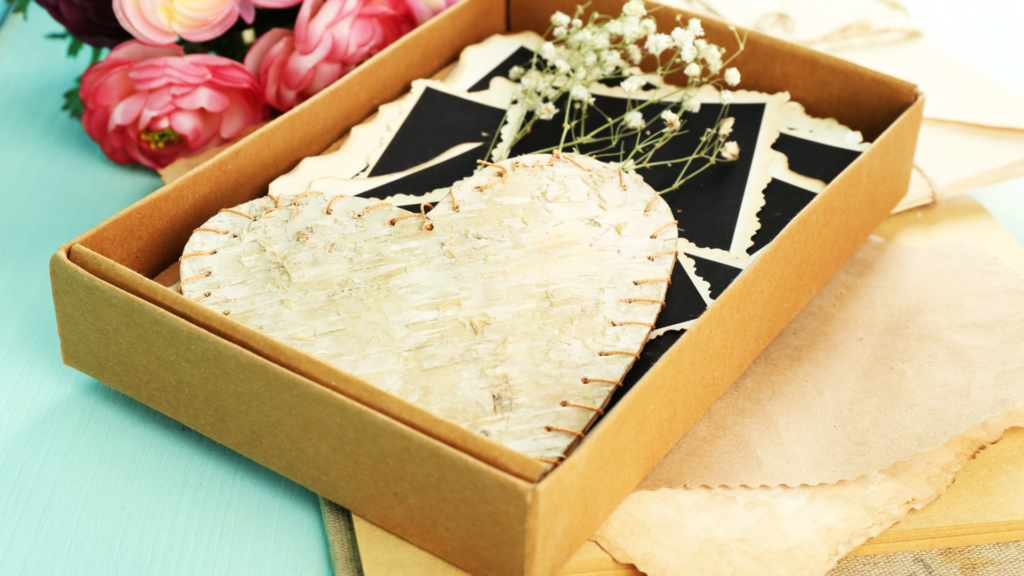
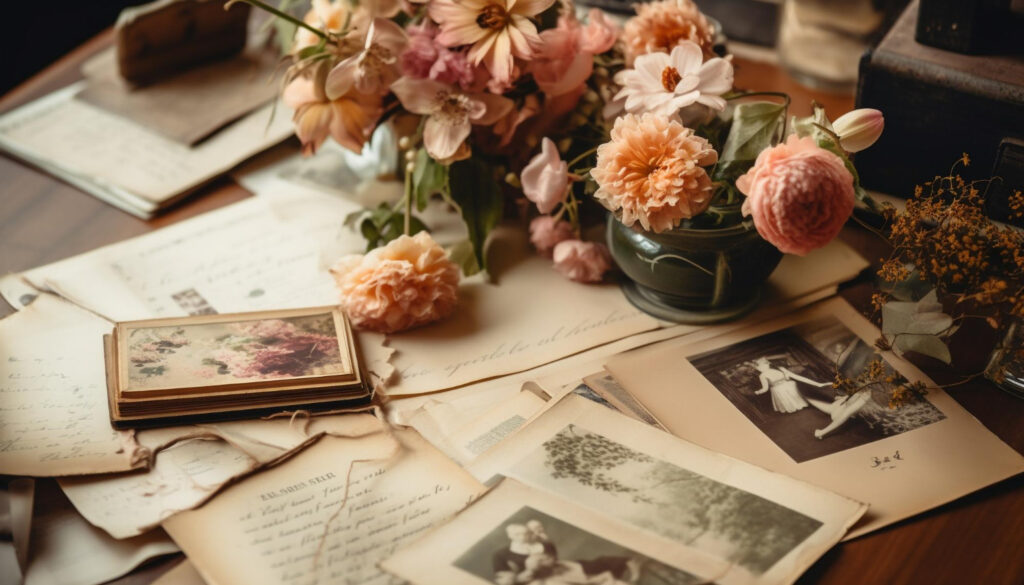
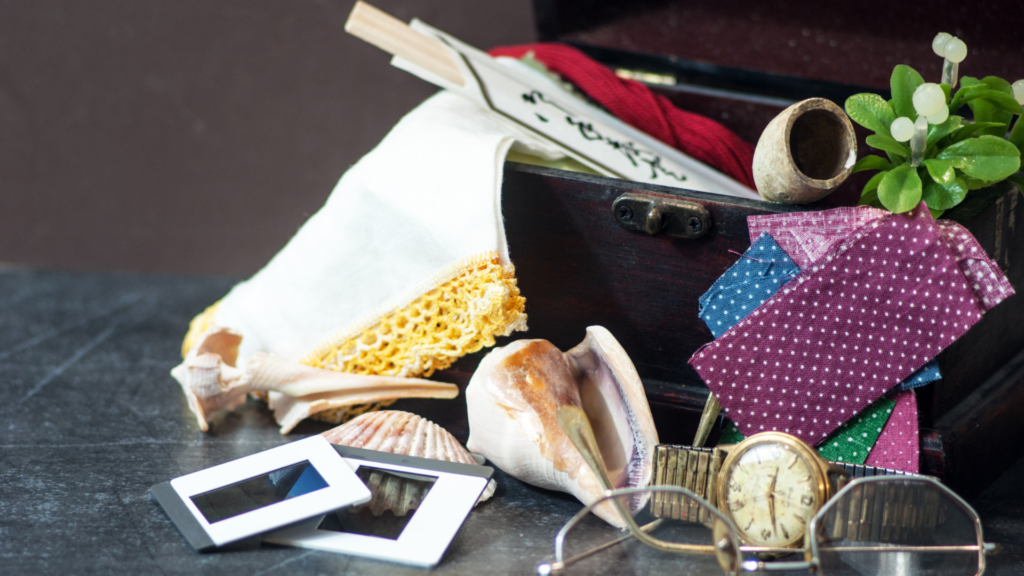
- Personal touch: Add personal touches such as handwritten notes, photographs, or small trinkets that hold special meaning for the recipient. These personal touches make the memory box more heartfelt and unique. For example, you can use a piece of your grandmother’s favorite fabric or a map from a memorable trip.
3. Organizing and arranging contents
To ensure that the contents of the memory box are well-organized and visually appealing, follow these expert tips:
- Sort and categorize: Sort the items you plan to include in the memory box into different categories. This will help you determine the best way to arrange them within the box.
- Layering and placement: Create depth and dimension by layering items of varying sizes. Place larger items in the back and smaller items in the front to achieve a balanced and visually pleasing arrangement.
- Focal point: Select a focal point or centerpiece item that stands out and draws the viewer’s attention. This could be a photograph, a meaningful object, or anything else that holds significant value.
- Labeling and tagging: If desired, label or tag specific items to provide context or add a personal touch. This can help the recipient easily identify and appreciate the contents of the memory box.
- Organize with compartments: This will help you keep memories organized and prevent them from getting damaged.
4. Preserving and protecting the custom memory box
To ensure that your custom memory box stands the test of time and preserves its contents, it is crucial to take the necessary measures for preservation and protection. Here are some expert tips:
- Quality materials: As mentioned earlier, opt for high-quality materials that are resistant to damage and deterioration. This includes acid-free paper, archival-quality adhesives, and protective coatings for the box.
- Keep away from direct sunlight: Display or store the memory box in a location away from direct sunlight. Sunlight can cause fading and damage to photographs and delicate items.
- Proper storage: Store the memory box in a cool, dry place to avoid moisture damage. Consider using acid-free tissue paper or archival sleeves to protect delicate and fragile items.
- Preserve fragile items: If your custom memory box includes delicate or fragile items, take extra care to protect them. Use acid-free tissue paper or archival sleeves to shield photographs or fragile objects from damage. This will ensure they can be enjoyed for years to come.
- Regular maintenance: Periodically check the memory box for any signs of damage or deterioration. Make any necessary repairs or adjustments to ensure its long-term preservation.
Conclusion
In conclusion, creating a custom memory box is a labor of love, but the end result is a priceless treasure that captures the essence of special moments. Whether you create one for yourself or someone dear to you, this personalized keepsake will be cherished for a lifetime. By incorporating expert tips, including considerations for luxury packaging, you can create the perfect custom memory box that reflects your unique story. So, gather your mementos, unleash your creativity, and embark on a journey of preserving memories in a tangible and meaningful way.
FAQs
1. Why do people keep memory boxes?
People keep them because they serve as a container for cherished objects, creating a tangible representation of the person lost. These boxes provide a tangible connection to memories beyond what a photograph can capture. It offers a personal, tactile experience, allowing individuals to revisit special moments and deepen their connection to the memories of their loved ones.
2. What is the best material for a memory box?
When considering materials for a memory box, various options exist, including wood, plastic, and cardboard. While wood offers durability and a classic aesthetic, plastic provides versatility and resilience. However, cardboard stands out as the best choice due to its lightweight nature, making it easy to handle, customize, and store. It strikes a balance between practicality and personalization, making cardboard an ideal material for crafting memory boxes that are both functional and visually appealing.
3. What is the best size for a memory box?
The best and standard size for a memory box is around 12 inches by 9 inches, akin to the dimensions of a shoebox. This size strikes a balance, providing a robust container that is both spacious enough to accommodate various mementos and easy to store.
4. How to decorate a memory box?
Personalizing a memory box involves using materials like paint, fabric, sequins, and stickers. The box can be covered with fabric or painted, and additional craft materials can be incorporated for a personalized touch. Many individuals choose to include meaningful photos of their special person on the box’s lid. The key is to use materials that resonate personally, creating a uniquely decorated memory box that reflects the individual’s connection to the memories within.